


Read time: 5 Min
Microsoft Outlook stores an offline copy of mailbox data locally, commonly known as an OST file. This OST file lets you work offline when you don’t have an internet connection. Changes made to an OST file are later synchronized to the Exchange Server or Office 365 account it is configured with.
Though the OST file is a synchronized copy of the mail server, some users might still need a copy of mailbox data for archiving, compliance, migration, or recovery purposes. Microsoft allows users to move mailbox data to PST format when a portable backup copy of mailbox data is required.
In this article, we will discuss different methods to back up OST files, including the built-in Export and Archive method and a professional OST to PST Converter.
Why Back Up OST Files?
Creating a separate copy of mailbox data even when the original mailbox data is available in Exchange Server or Microsoft 365 is beneficial in many situations. Here is a list of some popular scenarios:
- Migration of Data: If you need to move mailboxes between systems, exporting data to PST format is an easy and reliable option.
- Archiving: Sometimes users want to maintain older emails separate from other active mailbox data.
- Preserving Data: When an organization needs to preserve some important mailbox data, a local copy can be helpful.
- Recovery Service: If the original user profile is not available, or the OST file is inaccessible, a backed-up mailbox will help users to access information.
Manual Methods to Backup OST Files
Method 1. Export OST Data to PST Using Import/Export Feature
Outlook has an inbuilt Import/Export feature to export mailbox data to Outlook PST format. The steps required to back up OST file are as follows:
- Open MS Outlook.
- Click on the File tab, select Open & Export.
- Now click Import/Export.
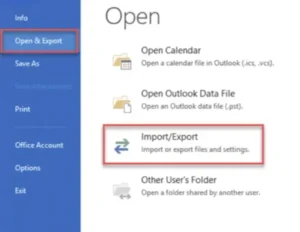
- In the next step, select Export to a file and click Next.
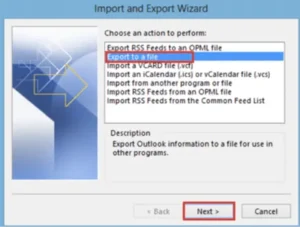
- Now select the Outlook Data File (.pst) option and click Next.
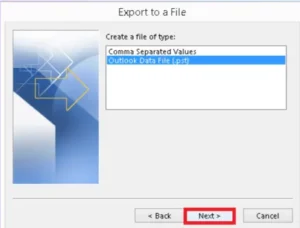
- Select the mailbox folders to back up.
- Enable the option to include subfolders.
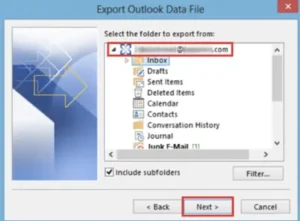
- Click Next.
- Now select the destination where you want to save the backup file.
- Type the File Name for the backup.
- Click Finish.
Method 2: Backup OST File Using Outlook Archive
The second method to backup OST file manually is the Archive feature available with some classic Outlook versions. The Archive feature moves older Outlook mailbox items into an archive file based on the settings selected. Follow the steps to use this feature:
- Open Outlook.
- Click on File > Info.
- Under the Cleanup Tools option, select Archive.
- Now select the folder for archiving.
- Choose the destination to save the archive file.
- Configure the date and other available settings.
- Click OK to finish.
Method 3: Copy the OST File
Users can also back up the OST file by closing the Outlook application and copying the OST file. The steps to follow are:
- Close Outlook completely.
- Locate the OST file on your system. The default location of the OST file is C:\Users\YourUsername\AppData\Local\Microsoft\Outlook
- Copy the file to another folder, external drive, or backup location.
Method 4: Use Professional OST to PST Converter
If you have an orphaned OST file, i.e the original profile is not available, you need to take the help of a professional OST to PST Converter. BLR OST to PST Converter is one such software especially designed to extract mailbox data from an OST file and save it to PST format. The software also provides options to save OST file data to different formats such as PDF, HTML, EML, MSG, MBOX, etc. Users can also directly import OST file to an Office 365 account with the help of this advances OST to PST tool. 
Conclusion:
Backing up important mailbox data helps to protect it from unexpected data loss. While Outlook provides an option to export mailbox data to PST format, an OST to PST Converter is required when the OST file is inaccessible or orphaned. We have discussed both manual methods as well as shared an advanced OST to PST Converter to choose from. Choose the best method according to your requirements.