ot a lot of Outlook data stored in an OST file and need to get it to your webmail account? You’re not alone. While OST files are perfect for working offline, migrating them to a new platform like Office 365 can be a headache, especially since you can’t just drag and drop them in. The good news? AzCopy is a powerful, command-line tool from Microsoft that can help you in migrating. In this guide, we’ll use AzCopy to migrate OST file to Office 365 mailbox. Let’s check out the complete steps.
OST or Offline Storage Table is a file that contains emails from Outlook locally on your system. It contains emails, contacts, calendars, tasks, and all other mailbox data. OST is created when your Outlook is connected with Exchange or any other IMAP accounts. However, if you are looking for a manual way to upload OST to Office 365, then you can use the AzCopy Tool by Microsoft.
Before you start, make sure you follow the given steps carefully without missing any details. Before you start, let’s know about the tool.
What is Azure AzCopy and Its Use?
AzCopy is a command-line utility developed by Microsoft. It allows users to transfer data, including emails, files, pictures, and other data, efficiently to and from Azure Storage.
If we talk about Office 365 migration,
- AzCopy is used to upload the PST file data into Office 365.
- Also, it keeps a local folder and Azure storage in synchronization.
- The best method to transfer a large data file with ease.
- It is the best way to backup your important data.
Before we start talking about the migration process, note that AzCopy cannot handle OST files directly. That’s why you must convert OST to PST first.
How to Use AzCopy to Migrate OST File to Office 365?
To simplify the process for you, we break it out into different steps. Let’s check out the process in complete detail. Let’s go.
Step 1. Convert OST to PST
- Open Outlook with the active profile.
- Go to: File > Open & Export > Import/Export.
- Select Export to a File → choose Outlook Data File (.pst).
- Select the mailbox/folders you want to export.
- Save the file as .pst.

Note: If OST is orphaned (not accessible via Outlook), you can use the BLR OST to PST converter tool for Windows.
Step 2. Download and Install AzCopy
- Download the latest version of AzCopy from the Microsoft Download Center. Then install it on your system.
Step 3. Get the Azure SAS URL from Office 365
1. Log in to Microsoft 365 Admin Center.
2. Navigate to Security & Compliance > Data Lifecycle Management > Import > Upload PST files.

3. Click Show network upload SAS URL.
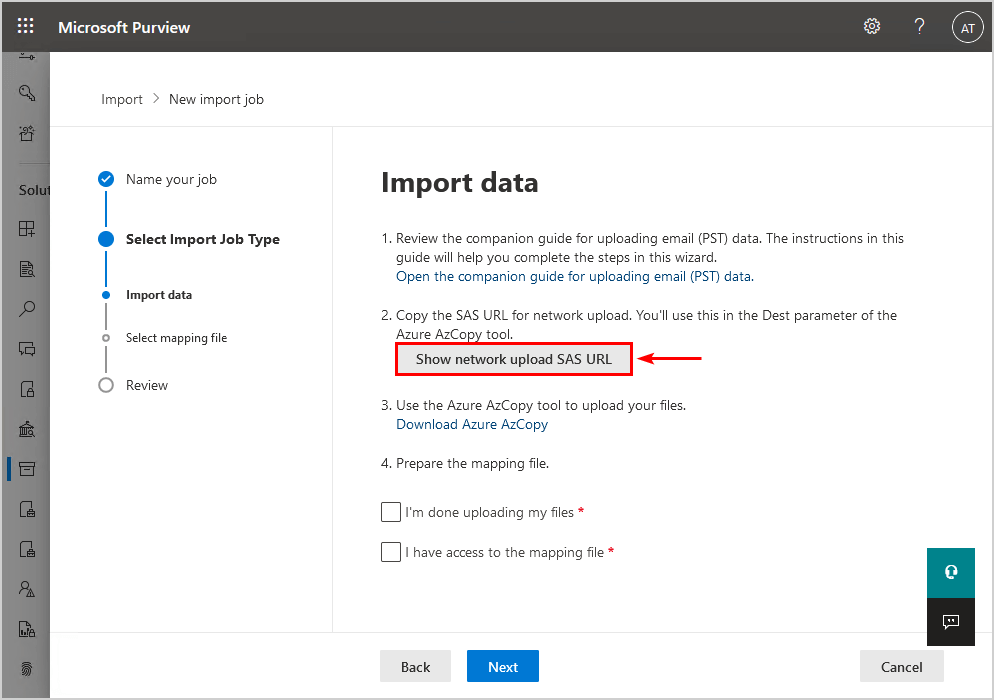
4. Copy this URL – it will be used by AzCopy to upload files.
Step 4. Upload PST Files with AzCopy
1. Open Command Prompt (Run as Administrator).
2. Run this command:
AzCopy.exe copy “D:\PST-Files” “<SAS-URL>” –recursive=true
- “D:\PST-Files” → Folder where your PST files are stored.
- “<SAS-URL>” → The URL you copied from Office 365.
- –recursive=true → Ensures all files in subfolders are uploaded.
3. Once uploaded, you’ll see a confirmation message in the terminal.
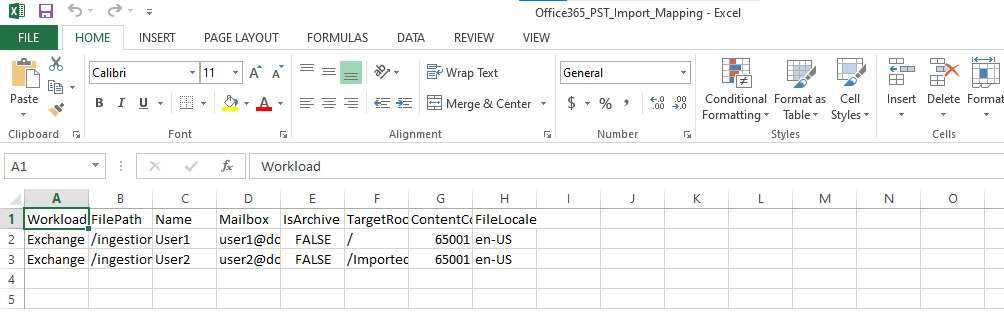
Step 5. Create PST Mapping File (CSV)
1. Download the CSV mapping template from the Office 365 Import page.
2. Fill it with details:
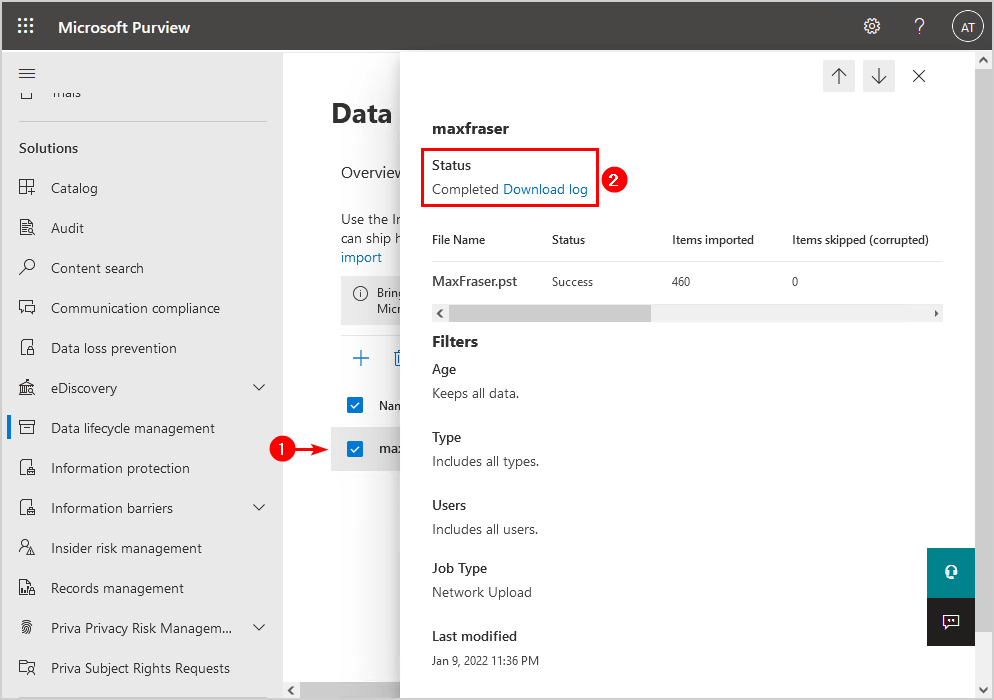
Step 6: Import PST into Office 365
1. Return to the Office 365 Import page.
2. Upload the CSV file.
3. Validate the file and submit the import job.
4. Once the job is complete, check the mailbox to confirm emails are imported.
Here, complete the process. Now you can access your OST emails in O365 mailbox with ease.
Conclusion
Using AzCopy, you can move OST data into Office 365 mailboxes easily. But first save it into PST format. Here we discuss the detailed process. Try the process with careful steps.
For small mailboxes, the manual export/import method works well. But if the OST file is large or orphaned, it’s better to use a professional OST to PST converter before uploading with AzCopy to save time and avoid errors.

1 thought on “How to Use AzCopy to Migrate OST File to Office 365?”
Comments are closed.