
Read time: 3 Min
OST is an offline data file that stores Outlook’s complete mailbox data. An OST file is created when you are connected to Exchange or any IMAP accounts. It will help user to access their emails offline, and the changes you make will be synced when you are back online. Have you ever found yourself in a situation where you want to access your emails after switching to Office 365? In such a case only option is to import OST to Office 365 account. We will learn how to import ost file in Office 365 in this blog, but let’s start with the reason when user is forced to import OST file to Office 365.
Why Users Need to Import Outlook OST to Office 365?
There are a number of reasons why users need to import OST file to Office 365 account. Here are some of the common reasons:
- Your company migrated from Outlook or Exchange to Office 365.
- The Outlook profile linked to the OST file is no longer available.
- The OST file is inaccessible, corrupted, or damaged.
- Need to access emails from an old OST file.
- You need the flexibility to access emails from anywhere, anytime.
How to Import OST to Office 365 Account?
OST files are a local copy of the mailbox data and are tied to the Outlook profile that was used to create them. Office 365 doesn’t allow importing an OST file directly, but there are some workarounds that can be used to import ost file in Office 365. Users first need to convert OST file to PST format to be able to complete the process. We have elaborated both the manual method and a professional automated solution below.
Manual Method to Import OST to Office 365
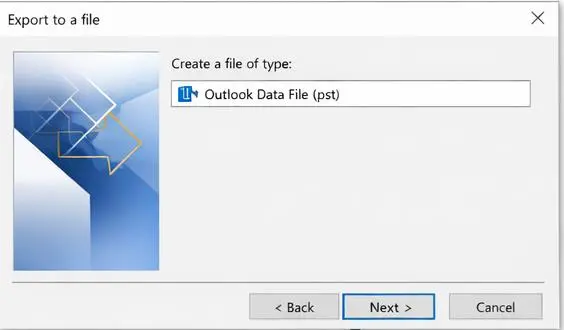
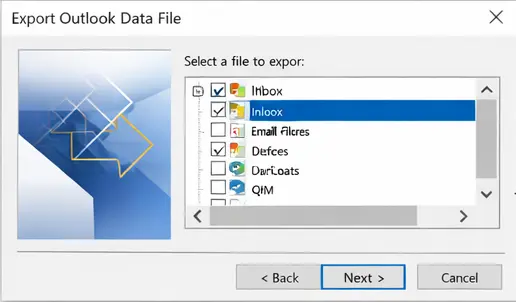
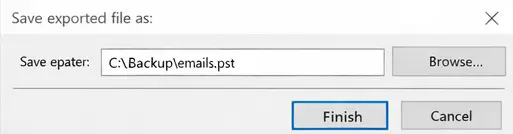
Step 1. Export OST Email to PST
- Open Outlook.
- Go to File → Open & Export → Import/Export.
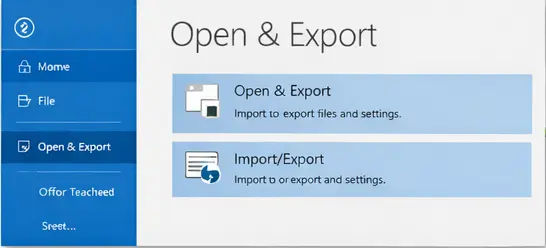
- Choose Export to a file → Outlook Data File (.pst).
- Pick the email account or folders you want.
- Choose where to save it and click Finish.
Step 2. Send Your PST File to Microsoft
- Upload Online: Use Microsoft’s AzCopy tool to upload the file to their cloud.
- Send a Hard Drive:
- Copy the file to a password-protected (BitLocker) drive.
- Ship it to Microsoft. They’ll put it online for you (extra cost).
Step 3. Set Up Your Office 365 Mailboxes
- Create Office 365 accounts for each person.
- Give them email licenses.
- Match each PST file to the right mailbox.
Step 4. Import Emails into Office 365
- Make a small CSV file that tells Microsoft which PST belongs to which mailbox.
- Upload it and start the import.
How to Import OST File in Office 365 Automatically?
With the help of the BLR OST to PST Converter tool, one can directly import Outlook OST to Office 365 mailbox without any hassle. Most importantly, you can import emails from corrupted, damaged, or inaccessible OST files. After you load the OST file, you can choose the email folders and import them only. With this tool, various additional features will be helpful.

- Option to convert OST to PDF, CSV, MSG, MBOX, and other file formats.
- Filter to upload emails from a specific date into Office 365 mailbox.
- If your OST file too large, then this tool will import without data loss.
- If you want to import your Inbox or sent folder emails, then you can choose them.
- Option to delete duplicate emails from the OST file.
- It also migrate OST to Gmail and many other webmail accounts.
- A free demo is also available to learn about the OST to Office 365 migration process.
Conclusion
In this article, we have discussed two methods to import OST to Office 365 account. The manual process requires a high level of technical expertise, and it is also time-consuming. To avoid such struggles, a professional OST converter is the best choice that can handle all your concerns. Its user-friendly GUI allows even a novice to import OST file to Office 365 account without any hassles.