
Read time: 5 Min
Imagine a scenario where a user switches to Google Workspace for a better mailing experience. However, the problem arises when important emails that need to be accessed in the Workspace account are trapped in an OST file. With no Outlook profile available and no direct way to import OST to Google Workspace, what can be done?
Don’t worry! This article explains step-by-step process to upload OST data to a Google Workspace mailbox without any data loss. Before going ahead, let us first understand the reasons for uploading OST emails to G Suite/Google Workspace.
Why Import OST to Google Workspace?
The reasons for uploading an OST file to Google Workspace may vary depending on the user’s requirements. However, some of the most common reasons include:
- Google Workspace provides better security for your important data, as it stores it safely in the cloud.
- An OST file can be easily corrupted, thus high chance of data loss.
- Once the OST file is uploaded to Google Workspace, users can easily access their emails anytime and from anywhere.
- Moreover, with Google Workspace, one can easily manage their emails in a single place without any hassle.
Methods to Import OST to Google Workspace
Uploading OST file to Google Workspace account can be done in two ways. You can either manually move your OST emails to Google Workspace account or use an automated tool. In the section below, let us discuss both solutions in detail. Without any further delay, let’s dive in.
Solution 1: Manual Method to Import OST File to Google Workspace
Using the GWMMO (Google Workspace Migration for Microsoft Outlook) tool, you can upload OST data to Google Workspace. However, before using this tool, you must first convert the OST file to PST format. Once the conversion is complete, you can start the migration process by following the steps below:
- Log in to your Outlook account associated with the OST file.
- Open Outlook, and click on the File.
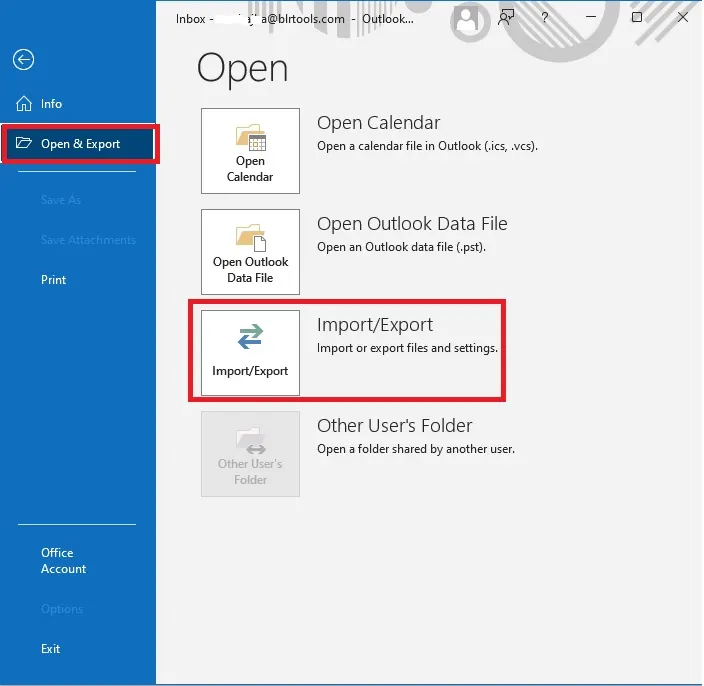
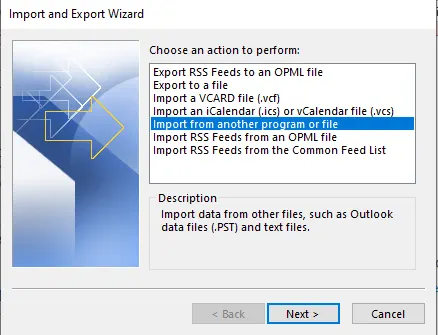
- Choose Open & Export and then Import/Export.
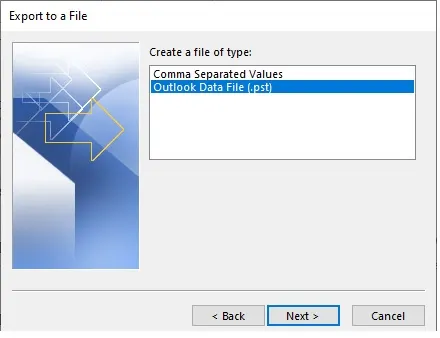
- Select Export to a file and click Next.
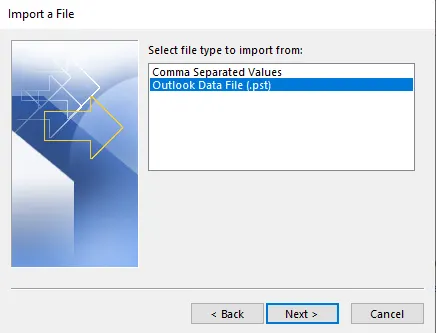
- Choose Outlook Data File (.pst) and again click Next.
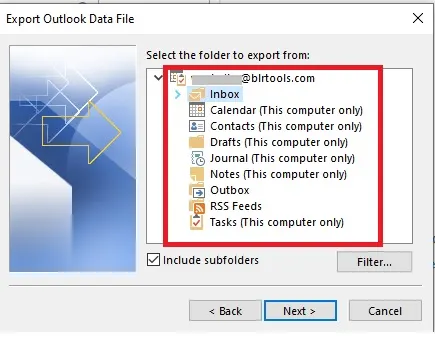
- Select the email folders or mailbox you want to export, and click Next.
- Choose the destination location and click Finish.
- Open your web browser and log in to your Google Workspace account.
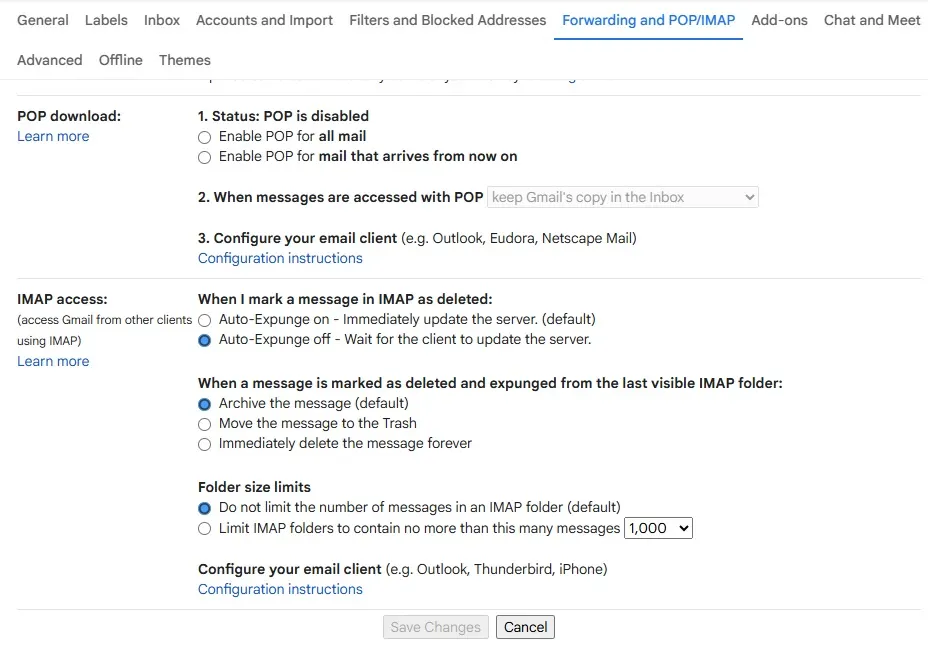
- Click the gear icon (Settings) on the top right and go to See All Settings.
- In the settings, find the IMAP Access section and make sure IMAP is enabled.
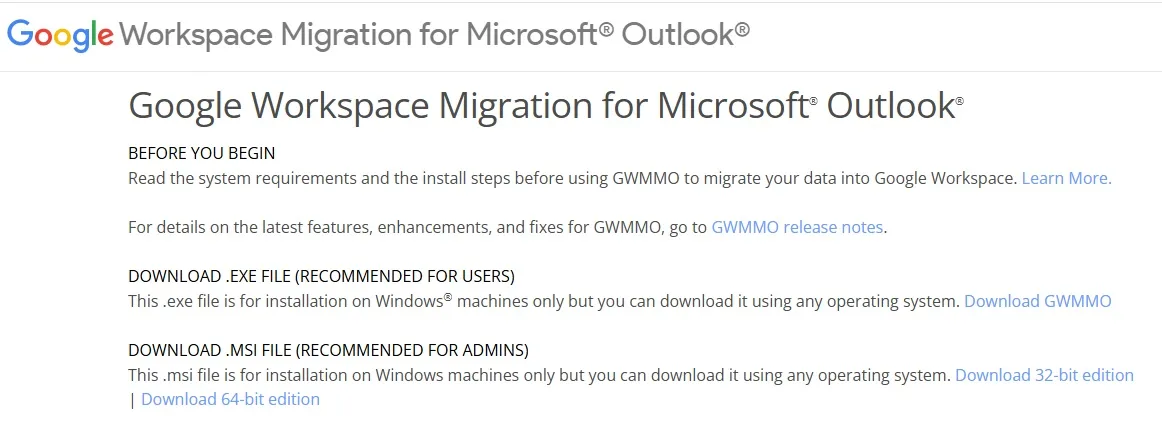
- Download the Google Workspace Migration for Microsoft Outlook (GWMMO) tool from Google’s official site.
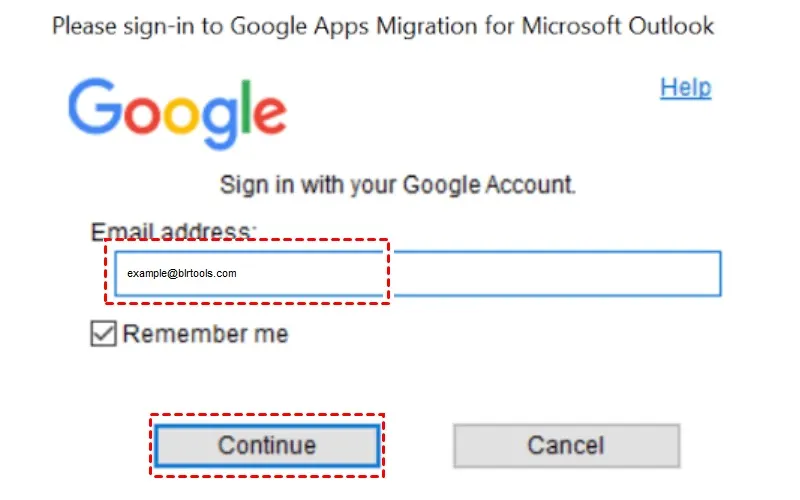
- Open the tool and sign in using your Gmail/Google Workspace account.
- Choose the option to import from a PST file.
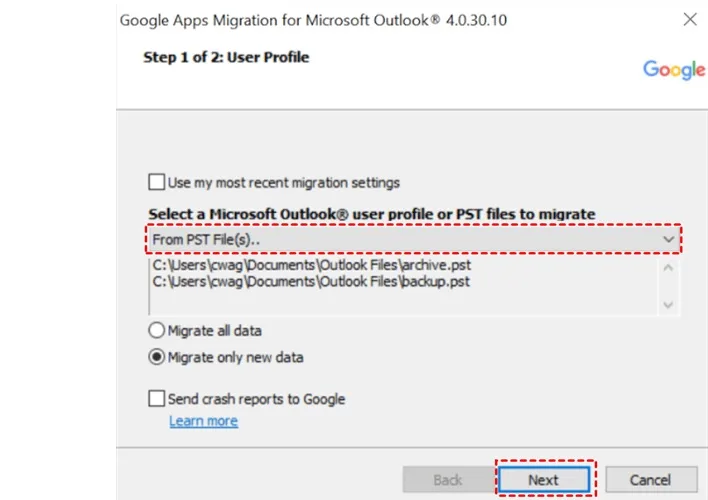
- Locate the PST file you saved earlier, and select the data you want to import (emails, contacts, etc.).
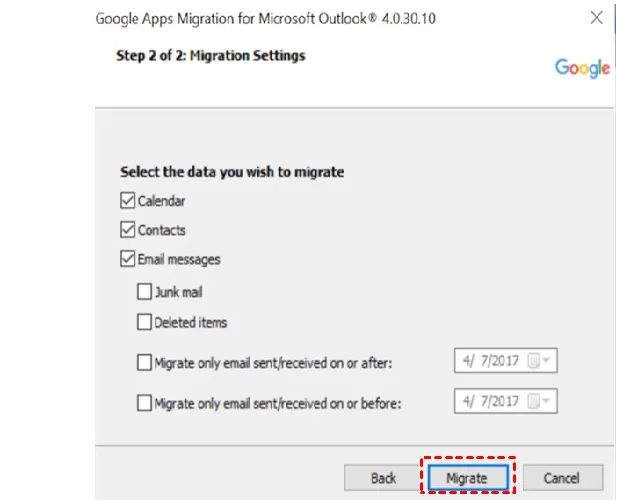
- Click Next and follow the instructions to complete the import.
- Once done, verify the data in your Gmail to make sure everything is imported correctly.
Solution 2: Upload OST File to Google Workspace Via IMAP
The GWMMO tool is quite complex for users who are not aware of the migration process. However, they can transfer the OST file data through IMAP configuration. Please note that you need to have Outlook on your system to create the OST file. If these prerequisites are met, follow the steps below:
- Open Outlook on your computer.
- Go to File > Add Account.

- Enter your email address and click Connect.
- Outlook will automatically detect the settings. Enter your password when prompted.
(Note: For Google Workspace with 2FA, use App Password.) - Once added, click Done to finish.
- Navigate to File > Open & Export > Import/Export >> Import from another file.
- Locate and open the PST file. ( Create PST file from OST file. For reference, jump to the steps mentioned in Solution 1).
- Once the PST file opens, its folders will appear in your Outlook sidebar.
- Simply drag and drop the emails or folders from the PST section into your G Suite inbox or any desired folder.
- Outlook will now sync the copied emails with your Google Workspace account automatically.
Still not sure about the steps to import OST to Google Workspace? Then, try out the alternative expert tool.
How to Upload OST file to Google Workspace Effortlessly?
Try out the BLR OST to PST Converter tool and effortlessly complete the import process. OST Converter tool will load OST emails, contacts, calendars, and other data to Google Workspace with complete data. Moreover, while uploading your data, the tool will preserve your email key elements and attributes. All you need to do is add the OST file and choose the IMAP option. Then, entering your Google Workspace login details, the tool will start importing your emails.

Conclusion
We discussed two solutions to upload OST file to Google Workspace. You can either use the manual guide to load your emails, but it is a time-consuming and tricky process. Alternatively, we mentioned using an automated tool such as BLR OST to PST converter to simplify the uploading process. Now, you can choose the best solution that solves your issue.
Hope this helps!