
Read time: 3 Min
Large organizations mostly use Microsoft Outlook in an MS Exchange environment. When a user profile is configured, an OST file is automatically created and stored locally on the user’s system. This OST file is an offline copy of the Exchange server mailbox and can be accessed only with the original profile used to create it. When the Exchange server connection is not available, this OST file is used to work offline. The changes made during the period are synced with the Exchange server when the connection is established. When a user switches email clients, the OST file needs to be converted to a different format that can be accessed with the new email client. In this article, we are going to learn methods to import OST to eM client efficiently.
Why Import OST File to eM Client?
There are several reasons why users choose to migrate OST emails to eM Client. Some of the common features are:
- An OST file can be accessed only with the original Outlook profile used to create it, which limits accessibility. In contrast, eM Client supports multiple IMAP and POP3 accounts, making it more flexible.
- By connecting multiple email accounts, eM Client allows effortless data management and transfer.
- Advanced features and strong data security make eM Client a reliable alternative to Microsoft Outlook.
- OST files are prone to corruption, and it is not an easy task to repair OST file, while eM Client ensures better safety and stability for your mailbox data.
Manual Method to Import OST to eM Client?
The eM client has no option to import the OST file directly, but supports importing a PST file, so users can first save emails in a PST file and then import the resultant PST file to the eM client. The steps involved to view OST emails in eM client are as follows:
Step 1: Export emails to PST file
- Open the Microsoft Outlook email client.
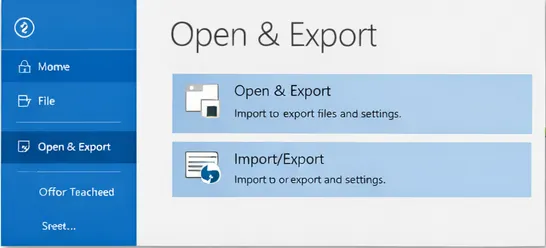
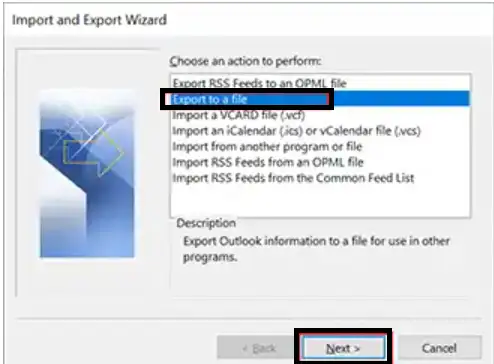
- Now navigate to File > Open & Export > Import/Export wizard.
- Select Export to a File from the options.
- Now select Outlook Data File(.pst) from the options available.
- Choose the destination where you want to save the PST file and click Save.
Step 2: Import PST to eM Client
- Open eM Client.
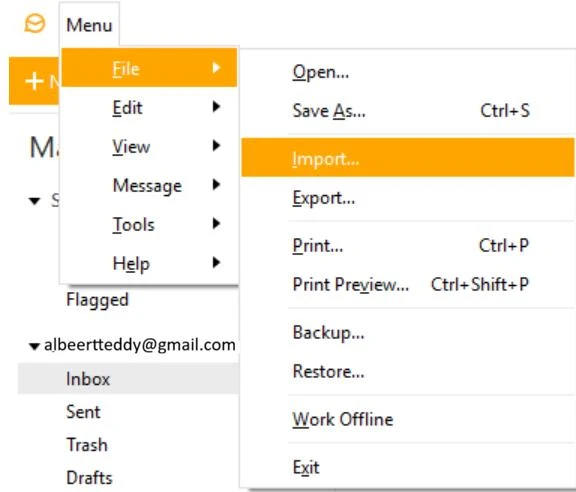
- Go to the Menu and select File > Import.
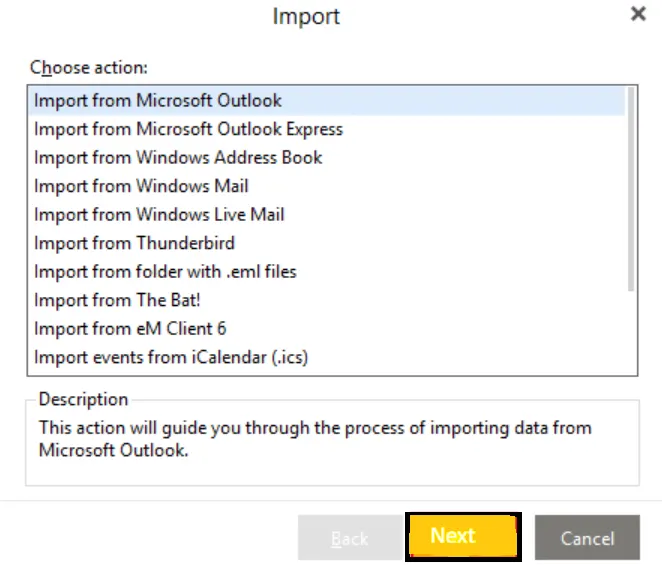
- Choose Import from Microsoft Outlook and click Next.
- Click “Select file” to locate your .pst file.
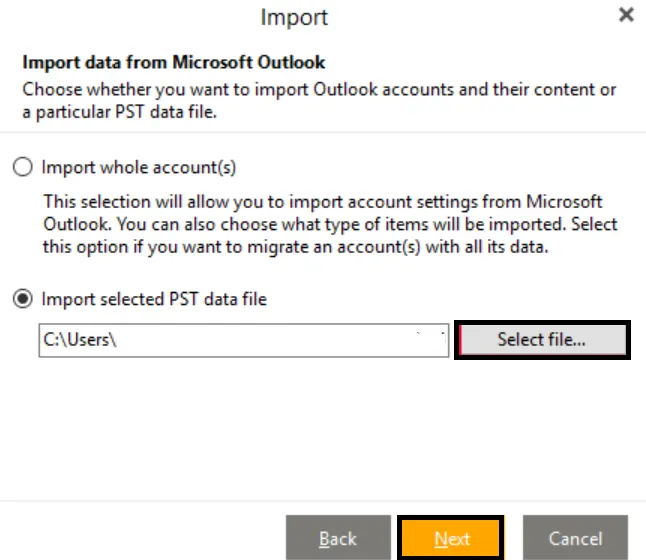
- Select the specific folders you want to import or choose to import the whole file.
- Click Finish.
- Only works if the original Outlook profile is accessible.
- Does not work for orphaned or inaccessible OST files.
How to Import OST to eM Client Automatically?
BLR OST to PST Converter is the safest approach to migrate OST emails to eM Client with complete data. To complete the importing, first convert OST emails to PST files, and then it will be easy to import them into the eM Client mailbox. Most importantly, the ost to pst software will preserve your emails’ key elements and attributes.

Even if your OST file is corrupted, damaged, and inaccessible, the software will import it without affecting your data. It supports importing an OST file from Outlook 2021/2019/2016 and all other older versions. Download the demo version of the software and experience the importing process.
Prominent Features of BLR OST to PST Converter software
- Effortlessly transfer OST emails to eM Client in a few simple clicks.
- Maintain email folder and sub-folder hierarchy and structure.
- Easily convert inaccessible OST file to PST, PDF, CSV, and many other file formats.
- Preserve email key elements and attributes while importing emails.
- Date range filter option to migrate emails from a particular time period.
- Option to import OST to Office 365, Gmail, and many other webmail accounts.
- Delete the duplicate emails from the OST file while importing its data.
- Compatible with Windows 11, 10, 7, and all other versions.
- Even if your Outlook OST file too large, the tool will securely import your emails.
Conclusion
One can’t directly import OST file into eM Client mailbox due to a compatibility issue. However, with the help of BLR Tools’ dedicated software, you can easily import your data in a few simple clicks. Try out its demo version and analyze its working process.