Various users are trying to access OST file in iCloud mailbox, but are not successful. If you are among those, then you are in the right place. Here in this post, we will discuss how to upload OST to iCloud with attachments. Continue reading and load emails, contacts, calendar, and other OST file data into iCloud mailbox.
OST file is a data file that stores the complete Outlook mailbox data. One can’t directly load the OST file into iCloud account. To effortlessly import OST to iCloud, one needs a secure and efficient tool. One such technique we will discuss in this post, but before, let’s analyze the reasons for uploading.
Why Import OST to iCloud Mail?
Depending on the user’s needs, there can be various reasons to upload oST emails, contacts, and other data to iCloud mailbox. Some of the common causes may be –
- If a user switches to Mac OS and wants to move all their data to Apple devices.
- You are an iCloud user, and your Outlook crashes, and you need to access your OST file, then you need to upload it.
- iCloud account offers you a secure environment to save your data. Since the OST file can easily be corrupted, this can lead your data loss.
- Since iCloud is primarily used with Apple devices, you may want all your data accessible on your current Apple device.
How to Upload OST to iCloud With Attachments?
BLR OST File Converter is the secure way to load emails from OST file into iCloud mailbox with complete data. With its simple working process, one can easily complete the uploading in a few simple clicks. All you need to do is add the OST file and choose iCloud as the export option. After entering your login credentials, the tool will start uploading your emails into your mailbox.
Moreover, you can use it without worrying about your data loss and affecting its integrity. To be on the safe side, you can use the demo version of the software. The trial one will upload 15 emails from each of the OST folders.

Steps to Upload Emails from OST to iCloud Account
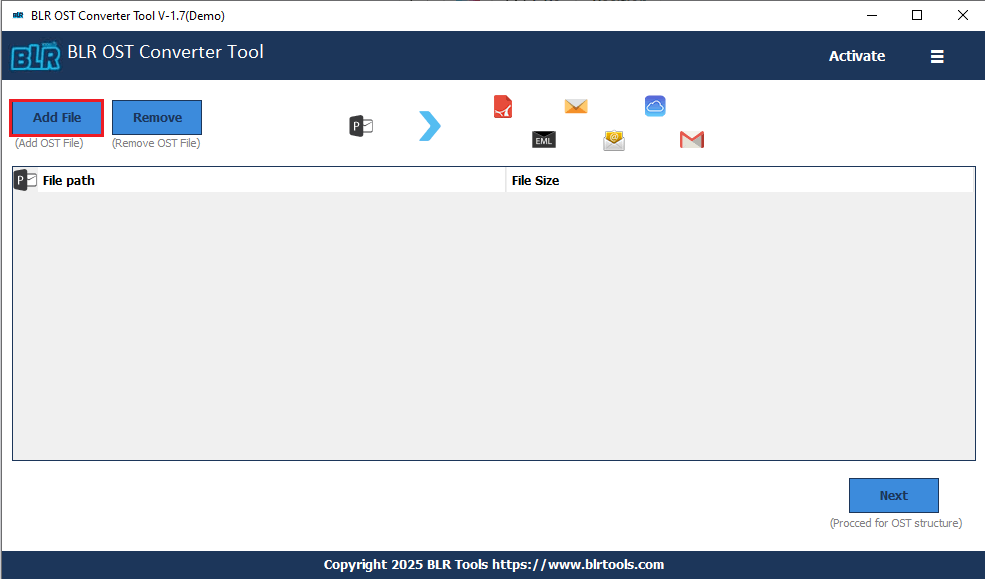
1. Run the BLR OST Mail Converter on your system.
2. Add the OST file and click Next to start the process.
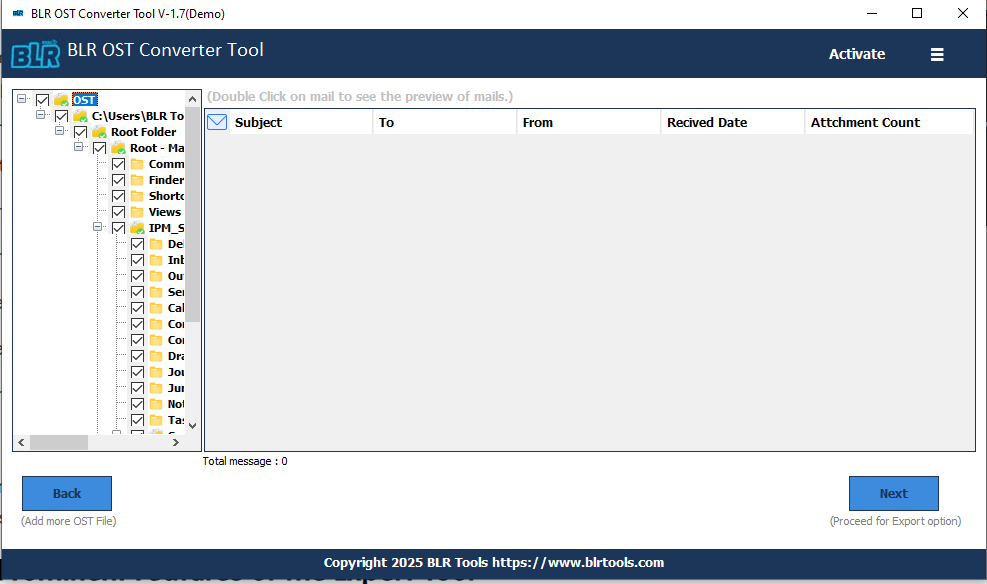
3. Choose the email folders you want to upload.
4. From the multiple export options, choose IMAP.
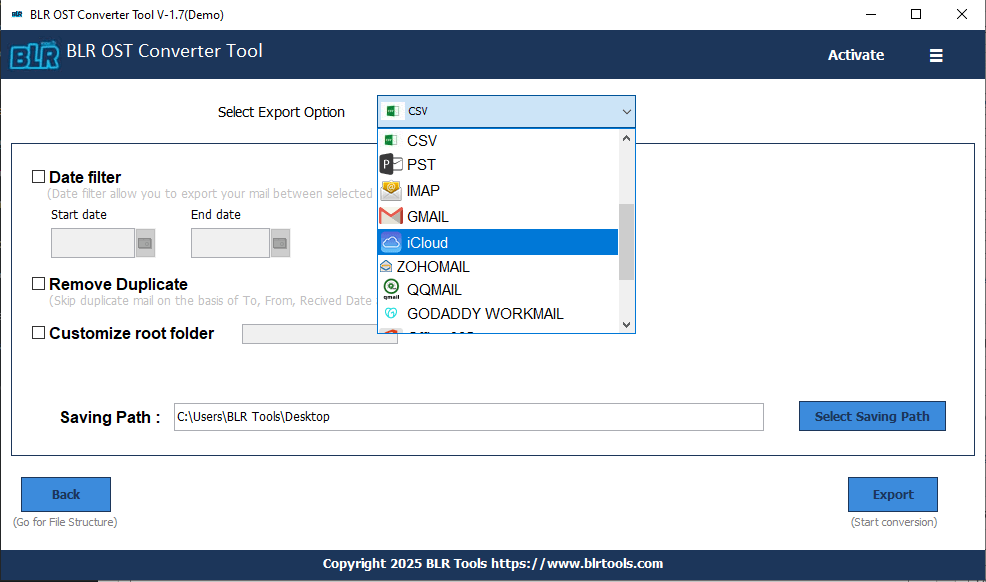
5. Enter your iClopud login details and hit the Sign In button. At last hit the Export button.

Done! Here starts the process, and the tool will upload OST file to iCloud with attachments.
Some Prominent Features of BLR OST Converter Tool?
- Effortlessly upload emails from OST file into iCloud mailbox in a few clicks.
- Allows importing selective email folders from OST to iCloud mailbox.
- Remove duplicate emails at the destination to avoid duplication.
- Export emails from OST to PST, PDF, CSV, EML, and other file formats.
- Maintain email folder and sub-folder hierarchy and structure.
- Date Range filter to upload selective emails only.
- Preserve email key elements and attributes while uploading emails.
- Option to move OST to Google Workspace, Outlook Web Access, and other webmail accounts.
- Runs on Windows 11, 10, 7, Vista, and other versions.
- A free trial version that moves 15 emails from each folder.
Conclusion
This how-to tutorial guides you to upload OST to iCloud with attachments. You can use the given solution and complete the importing process without any hassle. Try out the demo version before moving to the licensed one. Hope you are now aware of the complete process of uploading.
2 thoughts on “How to Upload OST to iCloud With Attachments? Complete Guide”
Comments are closed.