Summary: In this post, we will discuss the easy-to-use method to move OST emails to Windows Live Mail. Read till the end and find the ways to move all emails from OST file into Windows Live Mail inbox with ease.
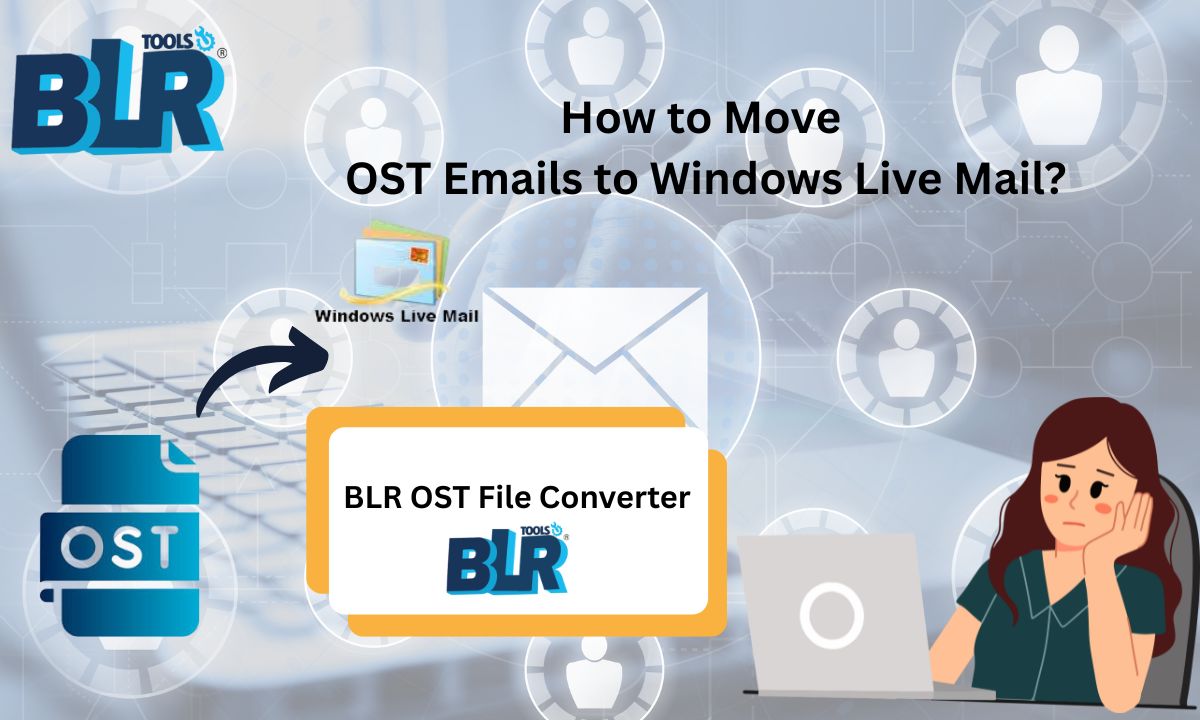
Do you have OST file and want to transfer its data into your Windows Live Mail account? If yes, then this post is for you. Till now, you have come to know that your Windows Live Mail doesn’t support the OST file. To complete the task, you need to convert OST emails into a file format compatible with Windows Live Mail.
Unfortunately, converting the OST emails needs an expert tool since the data file is corrupted. Therefore, you need a tool that will help you move OST emails to Windows Live Mail with ease. Before that, let’s know the benefits of moving OST emails. ‘
Why Need to Import OST to Windows Live Mail?
There can be various situations when users want to open OST file in Windows Live Mail. Some of them include –
- You received an orphan OST file, and you are currently using the Windows Live Mail client.
- After leaving the job, you have your important emails in the OST file. In the new Office, they use Windows Live Mail, and you need your old data as well.
- Outlook is no longer installed, but you have the OST backup.
How to Move OST Emails to Windows Live Mail?
In the absence of a manual approach, using the BLR OST Converter is the best choice. All you need to do is add the data file, and it convert OST to EML file. After that, you can easily import the exported data file into Windows Live Mail. Most importantly, the tool supports importing emails from orphan or inaccessible OST file without any data loss. Moreover, while moving OST file data, the tool will preserve email key elements and attributes.
Click the link below and download the demo version of the software.

Steps to Import OST File to Windows Live Mail
1. Run the BLR OST File Converter on your Windows.
2. Click on Add file button and browse the OST file.
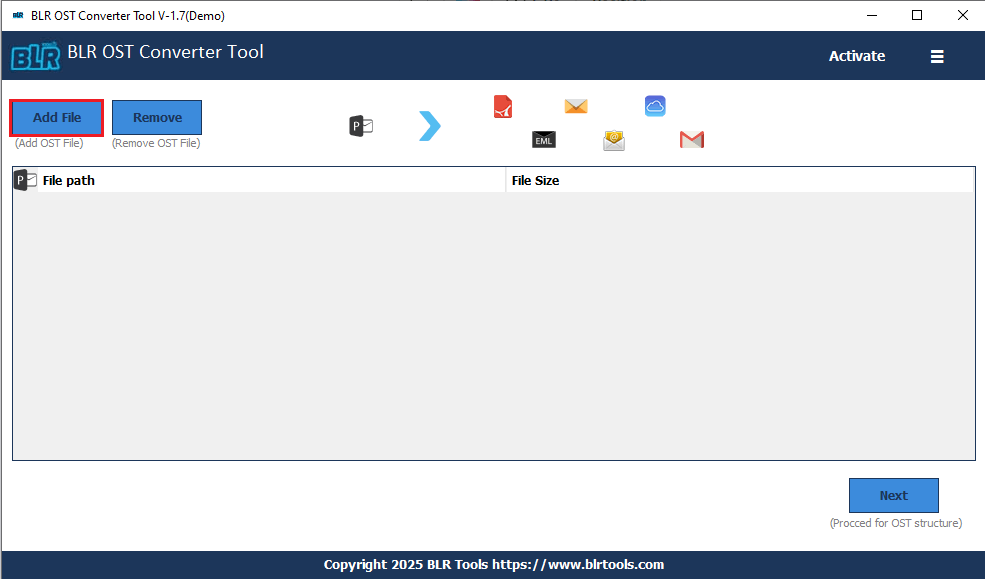
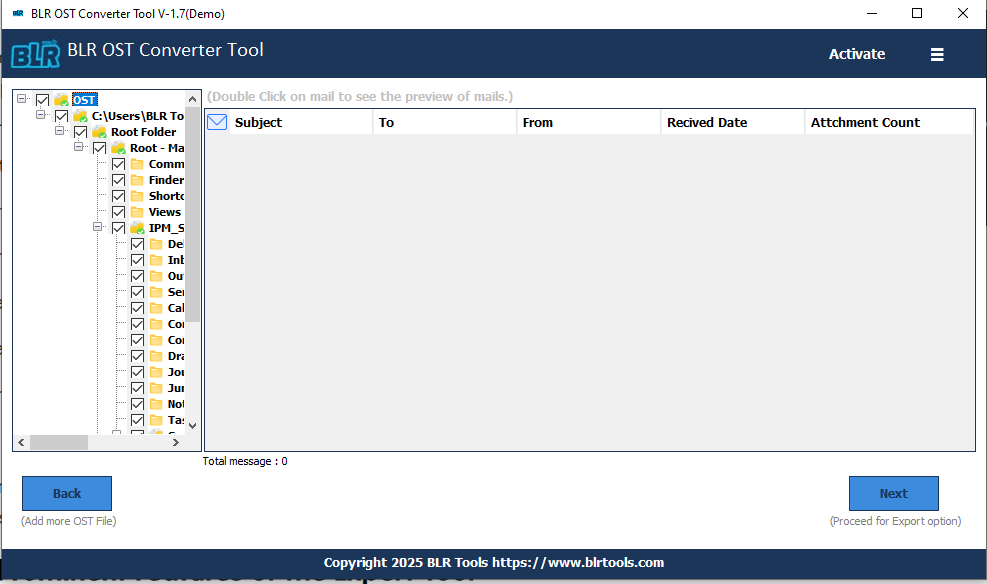
3. Choose the email folders you want to move.
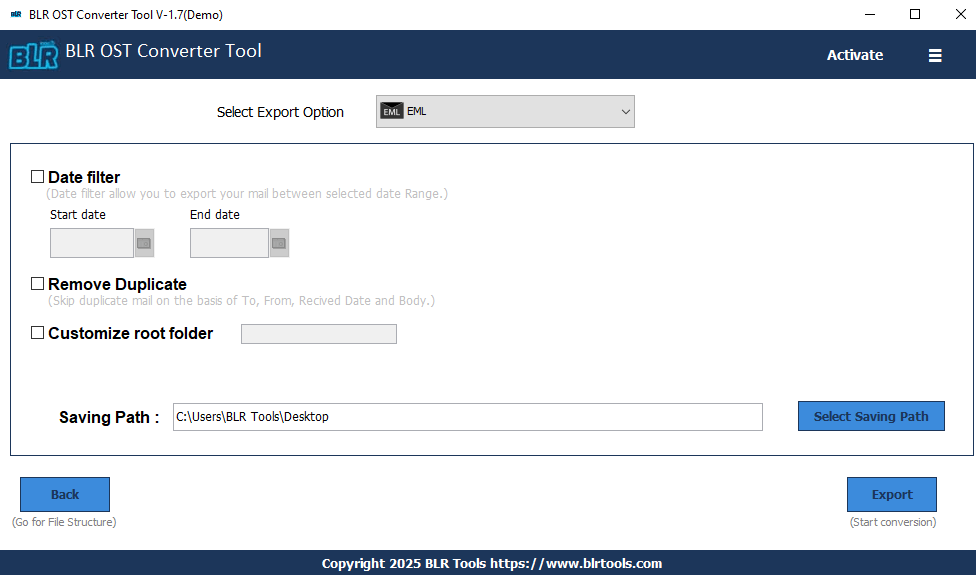
4. Choose EML from the multiple export options.
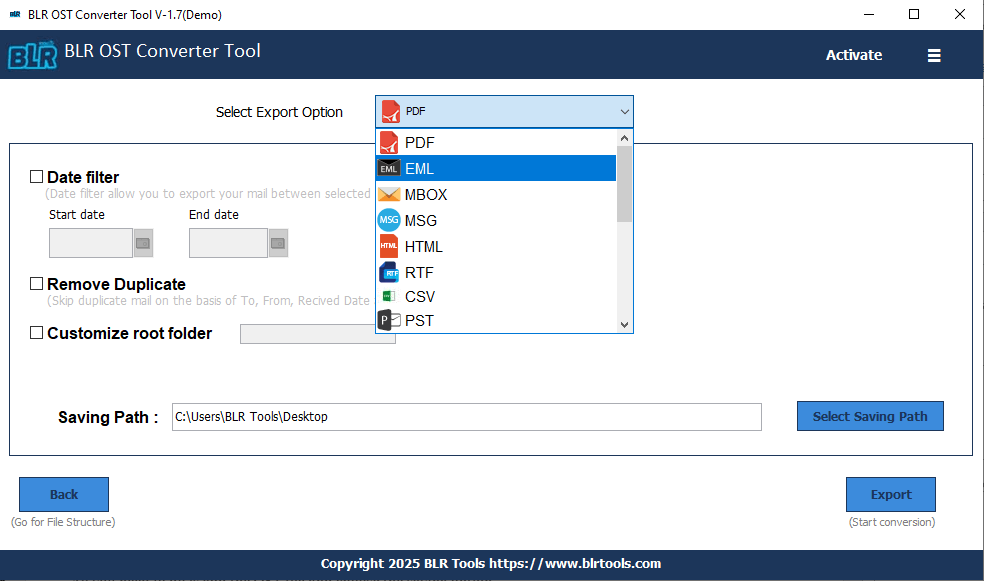
5. Browse the saving location and hit the Export button.
6. Open Windows Live Mail and go to File >> Import messages.
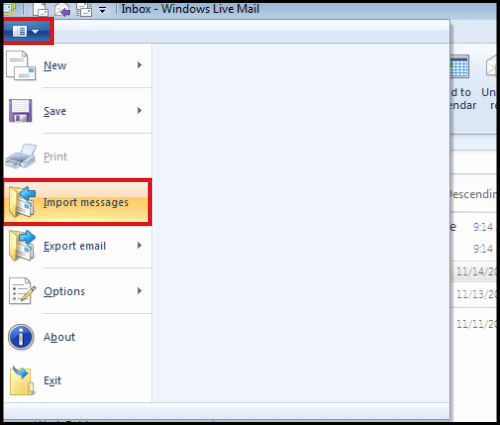
Browse the exported .eml files and complete the task. Now you can open OST emails in Windows Live Mail account.
Why Use Professional Tool for Importing?
With this tool, there are various prominent features, some of which include –
- Easy Email Migration: With this tool, you can easily move OST emails to Windows Live Mail in a few simple clicks. All you need to do is add the OST file and choose the saving option.
- Preserve Data Integrity: Most importantly, while migrating emails, this tool will preserve email key elements. Each email will be moved with its header info, body text, inline images, hyperlinks, signature, attachments, etc.
- Multiple Saving Options: With this tool, you can also export emails from OST to PST, PDF, CSV, and other file formats. Importantly, all the saving options are present in a single interface.
- Windows Compatibility: The software works on Windows 11, 10, 7, 8, and other versions. Run the tool without any worry and open OST file in Windows Live Mail.
- Multiple IMAP Import: Using this tool, you can easily move emails from OST file into various webmail accounts. Use it and import OST to Office 365, Gmail, Yahoo Mail, and many other email accounts.
- Folder Selection: If you don’t want to move the complete OST file data, then you can select which data you want to open. All you need to do is add the file and choose the email folders you want to move.
Conclusion
In this post, we have discussed the best way to move OST emails to Windows Live Mail account. Since there is no manual way, you need an expert solution. One such tool we have discussed here. To analyze its working process, you can use the demo version of the tool,