Overview: Are you an Outlook user who has an OST file that you want to transfer to Yandex.Mail account? If yes, then this post is for you. Read the complete post and effortlessly transfer OST emails to Yandex Mail with attachments.
Yandex Mail is the free webmail service in Russia. It is known for its unlimited storage, strong spam filters, and fast interface. That’s why many of the users are looking for a solution to import OST emails to Yandex Mail with their complete data.
In this post, we’ll explore the reasons for transferring OST emails to Yandex Mail and walk you through the step-by-step process. So, without further ado, let’s get started.
Why Users Want to Transfer OST to Yandex.Mail?
There can be various situations when a user wants to move emails from Outlook OST file into Yandex mailbox. Some of the common ones are –
When user switch to another platform, they want to move their old data as well. Therefore, most of the users prefer to move their OTS file into Yandex Mail.
- You have an orphaned OST file from a deleted account and can’t access your emails.
- If you have multiple OST files, then migrate all the data files to one place.
- Yandex Mail offers generous free storage and can be accessed from any device.
How to Transfer OST Emails to Yandex Mail?
Here in this section, we will discuss the two workable solutions to import OST to Yandex Mail. One is a manual solution, and the other is the direct approach. The manual method is quite lengthy and requires Outlook access. However, if the OST file you are trying to transfer is orphaned, then the manual method will not work. In that case, you can use the expert tool. Let’s check out the detailed process.
Approach 1: Manually Migrate OST File to Yandex Mail
Here, you need to access your Outlook profile and OST file from the same one. If both condition is fulfilled, then follow the given instructions –
1. Open Outlook and go to File > Add Account.
2. Enter your Yandex email address and select IMAP configuration.
3. Use the following server settings:
- Incoming Mail (IMAP): imap.yandex.com, Port: 993 (SSL)
- Outgoing Mail (SMTP): smtp.yandex.com, Port: 465 (SSL)
4. Enter your Yandex password (or an app password if you use 2FA) and complete the setup.
5. Once Yandex Mail appears in Outlook, open the OST mailbox.
6. Select the folders or emails you want to migrate and drag them into the corresponding Yandex folders.
7. Wait for Outlook to sync the data with Yandex servers.
Done! Here completes the OST to Yandex Mail migration. However, before you use this method, make sure you have the complete technical knowledge of configuration settings.
Approach 2: Transfer OST Emails to Yandex Mail Automatically
For direct and hassle-free migration, try out the BLR OST Converter tool on your Windows. The software effortlessly transfer corrupted, damaged, and orphaned OST file without any data loss. Moreover, while importing emails, the tool maintains the email folder and sub-folder hierarchy and structure. It is mostly suitable for non-technical users who are not familiar with the technicalities.
Download the demo version of the software to know its working process.

Steps to Import OST to Yandex Mail with Attachments
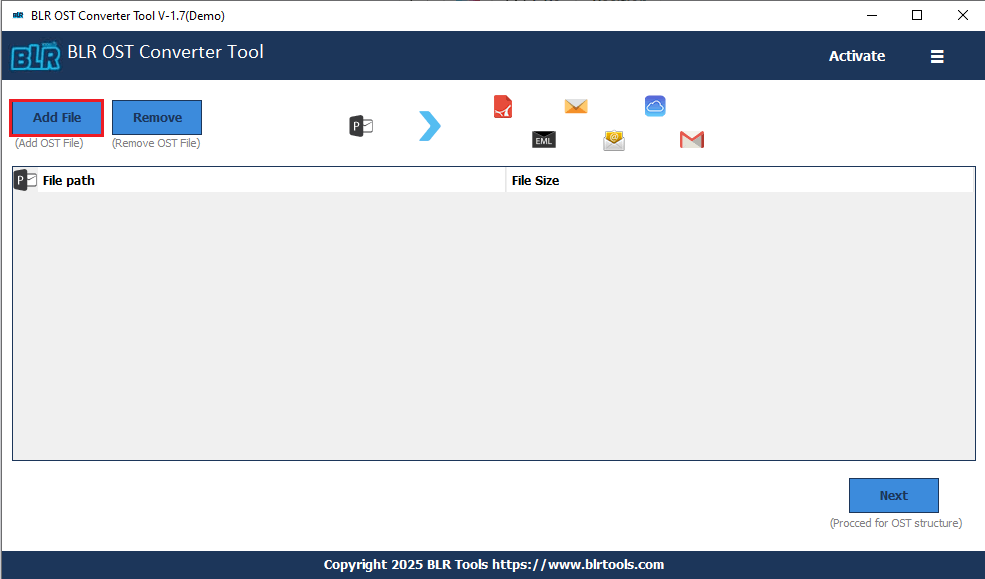
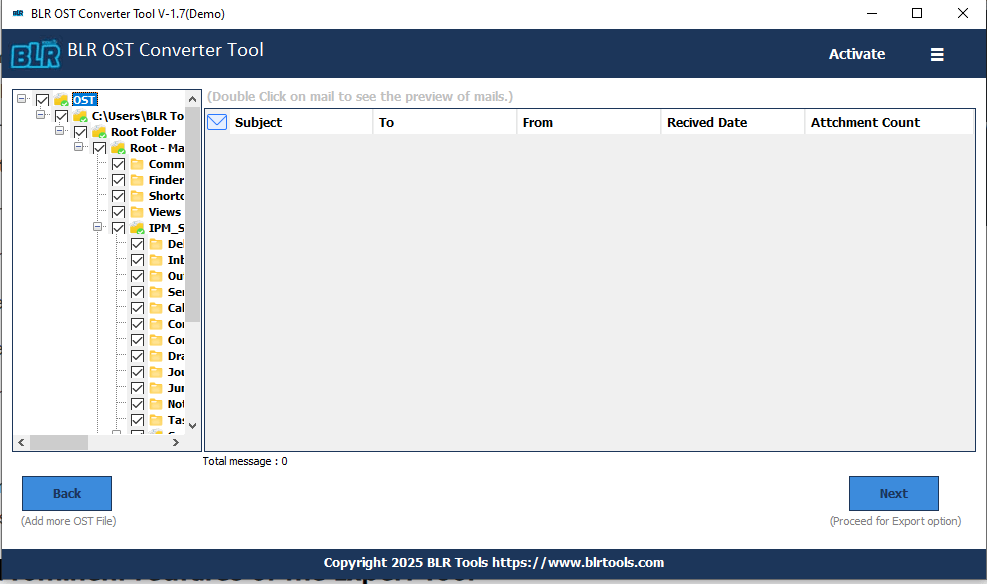
1. Run the BLR OST to Yandex Migration tool on your Windows.
2. After clicking on Add file button, browse the OST file.
3. If you want to import selective folders, then you choose them.
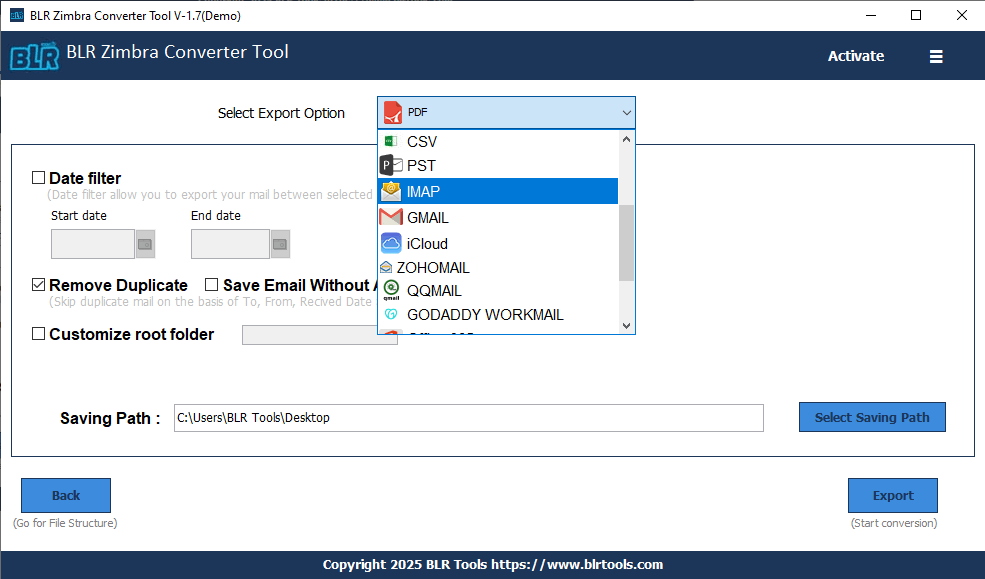
4. From the export options, find the IMAP option.
5. Enter your Yandex Mail login details and Sign in. After that, click on the Export button.
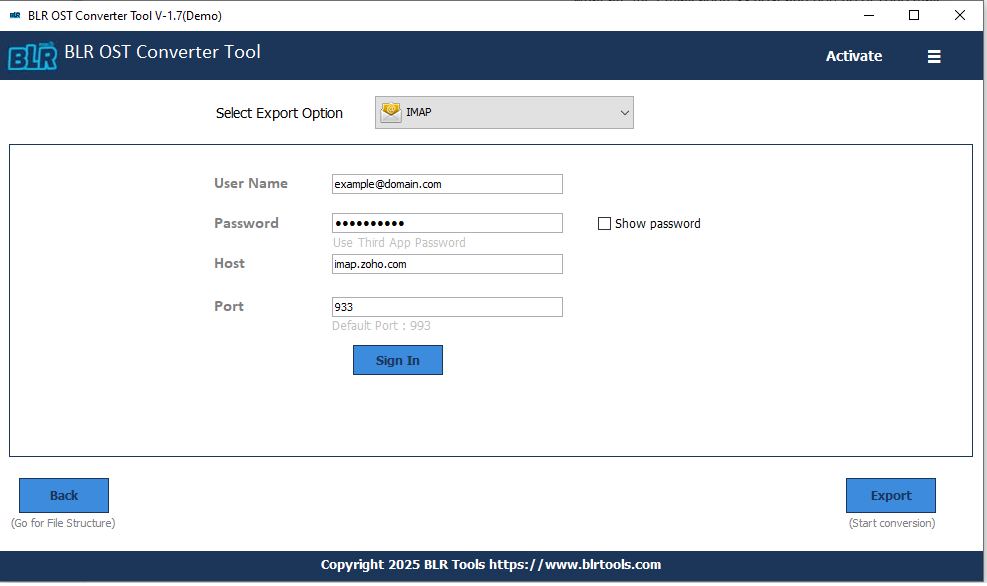
Done! Here, complete the OS to Yandex migration process in a few simple clicks.
Finish! Here are the simple steps to transfer emails from OST file into Yandex.Mail account.
Conclusion
Importing OST emails to Yandex Mail is not a difficult process with the right approach. If you have access to your Outlook, then you can opt for the manual solution. In the case of an orphaned or damaged OST file, the software is the best method. Now you can decide which of the mentioned solutions is best suited to you.